

How To Draw Smoother Lines In Photoshop
This site is reader-supported. We use affiliate links to support our expenses. Learn more
(Last updated on November 19th, 2021)
Do you want to draw something in Photoshop with lines? Want to get those lines looking just right with the perfect angles and look? Check out this in-depth tutorial on how you can draw lines in Photoshop.
Adobe Photoshop is a solid application for both photo manipulation and digital illustrations. While the photo editing tools are relatively straightforward, creating artwork in the program can be tricky. There's a lot of tools to consider when trying to design something.
- 1. Using the pencil tool
- 2. Using the line tool
- 3. Editing our line shape
- 4. Using the pen tool to edit our line
- So which method for creating a line is best?
- Frequently Asked Questions
A common question for those just starting to use the program is how to create something as simple as a line. The tools for creating lines are quite vast. Thankfully, creating a line is relatively simple but with plenty of options for customizations.
1. Using the pencil tool
Let's start with the easiest method of making a straight line. To start this, we'll first have to create a new document. Once you create this canvas, create a new layer by clicking the New Layer button of a box with a plus sign in your Layers panel, as this will be the layer we'll be using to draw.
You may already be familiar with some of the drawing tools for creating freehand drawings. To create a straight freehand line, we'll start using the pencil tool, which looks like a pencil in your toolbar. You can find it by clicking and holding on the paintbrush icon to open the options for other freehand tools.

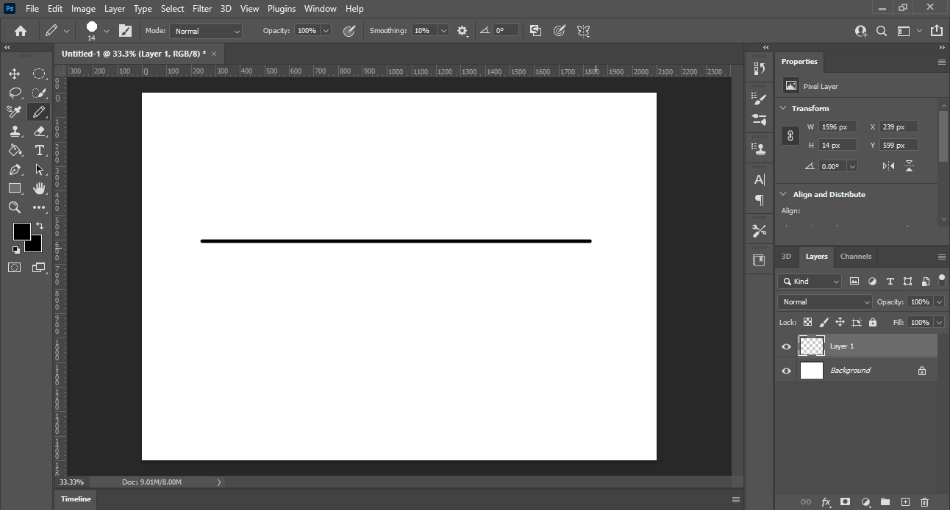
Click on the pencil to use it and change the color with the color swatches in your toolbar. Now we're going to draw a line straight across our canvas. Before you start drawing, make sure that you select the new layer you've just created in your layers panel.
Try drawing a straight horizontal line with your mouse by clicking and dragging across the canvas. If your hand isn't steady enough, you may notice you have created a few bumps in the lines. If you want to draw a straighter line, hit Control and Z to undo the line you made and try the following method.
While holding the Shift key, try drawing that same line again. You'll notice now that your line is perfectly straight, no matter how many times you try to move the mouse in a different direction. The moment you start drawing in a direction with the Shift key, your position is locked to be straight.
Using the Shift key and a freehand tool is an easy way to make straight lines fast. But what if you want to make straight lines at different angles? Freehand tools are limited in how many angles you can draw your lines, restricting you to horizontal or vertical.
2. Using the line tool
For more control over drawing lines, we'll need to use the Line tool. You can find this tool by clicking and holding on the Shape tool (it will look like a rectangle) in your toolbar. In the submenu that opens while holding, select the Line tool.
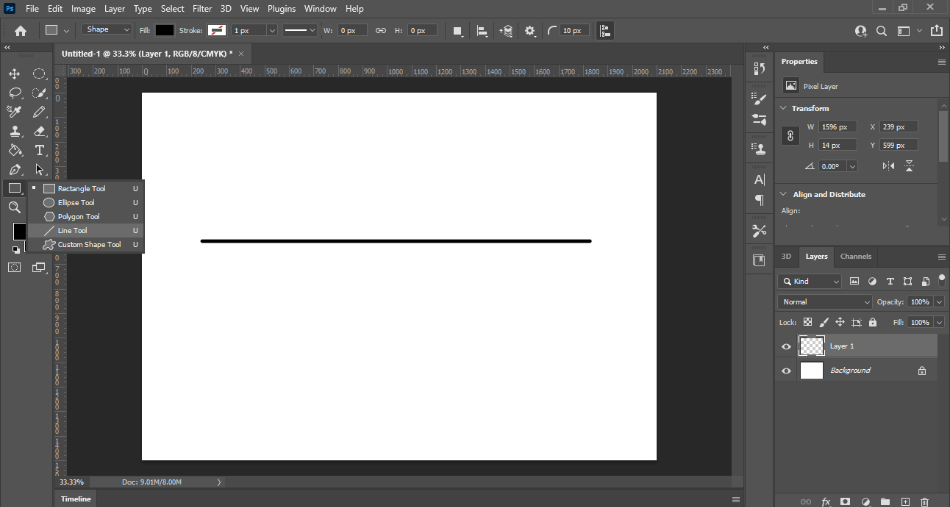
Try clicking and dragging on the canvas with the Line tool selected the same way you did with the pencil tool. You'll notice that you are now creating a perfectly straight line in any direction. If you want it to go straight across or straight down simply, all you have to do is hold down the Shift key while dragging.

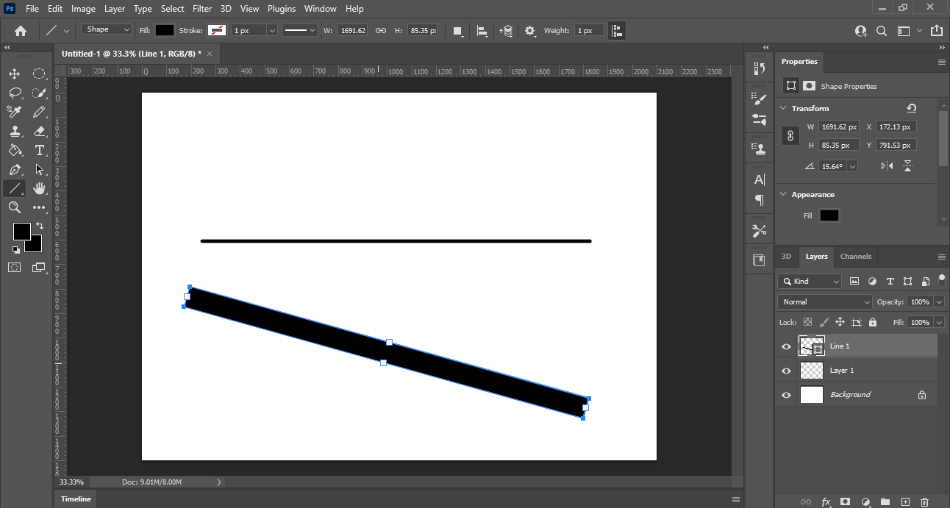
Looking over in the layers panel, you'll notice that our line has automatically created a new layer. It should be named Line 1, and you'll see the layer window has a little gray box inside. This means that your layer is editable and can be altered in a way that you can't with a paintbrush or pencil tool.
3. Editing our line shape
Look at your line and take note of how it has a blue outline with little white boxes. The white boxes represent the points where you can customize your line. For example, you can click and drag the white boxes in the middle to extend the height of a line.
Click and drag one of the white boxes in the middle of your line. You'll notice that the thickness of your line increases as you drag it up or down. This is recognized as the height of your line, where you can easily change how big or small your line will appear.
There's more than you can change about your line as well. Suppose you look at the customization panel above your canvas. You'll find plenty of other options to consider. You'll notice the color options for both Fill and Stroke that you can change.
The Fill is what appears inside your line, and the Stroke is the outline or border. You can alter the color of both, but the Stroke has more options. You can change the size of the outline with the dropdown menu next to the Stroke color.
You can also change the type of border with the dropdown next to the Stroke size. You can turn the outline into either a dotted or spatial line. You'll also notice the options in this dropdown menu for aligning the outline where you can make the border inside or outside your line.

4. Using the pen tool to edit our line
Now let's try altering our line even more. Select the Pen tool from your toolbar, which will look like an ink pen. You can also just push the P button on your keyboard if you'd like to use the shortcut for this tool.
With the pen tool selected, hover over your line. You'll notice that a white box will appear. This is a sign to let you know that you can create an edit point for altering your line. Like any other shape that you make in Photoshop, your line can be pushed and pulled the same way.
Choose a point on your line with the Pen tool and click and drag. You'll notice that you're now creating a curve. You can make the curve as subtle or bold as you wish. When you release your mouse, however, your line object will be transformed into a regular shape, which means you won't be able to alter the stroke or fill of the line.
If you make a mistake while doing this, you can either hit Control and Z or click and alter the anchor points that are automatically created. Click and hold on the Pen tool in your toolbar and select the Convert Point Tool (looking like an arrow).
The Convert Point Tool will allow you to change the curves you created with your lines. Using the Convert Point Tool to click and drag one of the small circles on the jutting outlines with a point selected. You'll notice the curve starts to take on a different shape.

So which method for creating a line is best?
The best choice ultimately depends on the type of project and how much detail you're going for. Ultimately, though, the Line tool will give you the best benefits.
Sure, the pencil or paintbrush method for freehand line drawing is simple enough to use right away. However, this method is only recommended if you're handy enough with the draw tools to create detailed illustrations. It's not recommended for someone who doesn't have a stylus pen or much experience drawing in Photoshop.
The Line tool method may seem daunting with its many options, but they're more convenient than intimidating. You don't have to worry about making a mistake while drawing a straight line if you don't have the steadiest hands or a stylus pen.
With all of the customization tools available, the Line tool is best suited for those with a basic design and who want simple solutions. With this tool, you'll be able to craft some highly polished lines and even shapes with ease.
Frequently Asked Questions
How do you use lines in Photoshop?
Lines can be drawn in Photoshop either through a freehand tool or the line tool. If you have a steady hand, you can use the freehand tools of the pencil or paintbrush tools while holding Shift. You can also use the Line tool if you want more control over the creation of lines. You can use these lines to develop everything from simple shapes to detailed drawings.
Which are the types of lines in Photoshop?
There are two different types of lines that you can create in Photoshop. The most common and default of line types is the straight line type. The other type is the curved lines type which is a bit trickier to draw but is ideal for creating less angular shapes.
How do I draw a straight line in Photoshop?
There are several ways to draw a straight line. If you're using the brush or pencil tool, all you have to do is hold down the Shift button while clicking and dragging across the canvas. This will create a perfectly angular line. You can additionally use the line tool, which creates perfectly straight lines at any angle.
How do I make a freehand line in Photoshop?
When you're using a freehand drawing tool like a pencil or paintbrush in Photoshop, simply hold down on the Shift button while drawing. When you do this, your freehand tool will go straight in whichever direction you're dragging. It's a great method to create perfectly horizontal or vertical lines. However, if you're seeking to create more angular straight lines, you'll want to use the line tool.

Mark McPherson has been working as a video editor and content writer for over ten years. His background started in animation and video editing before shifting into the realm of web development. He also branched out into content writing for various online publications. Mark is an expert in video editing, content writing, and 2D/3D animation.
How To Draw Smoother Lines In Photoshop
Source: https://www.designbuckle.com/draw-a-line-in-photoshop/
Posted by: compoorwastincer.blogspot.com
0 Response to "How To Draw Smoother Lines In Photoshop"
Post a Comment